CKG Docker Container
In this section we describe how to set up the Clinical Knowledge Graph from a Docker container.
- What is Docker?
Docker is an open platform for developing, shipping, and running applications. Docker enables you to separate your applications from your infrastructure so you can deliver software quickly. With Docker, you can manage your infrastructure in the same ways you manage your applications. By taking advantage of Docker’s methodologies for shipping, testing, and deploying code quickly, you can significantly reduce the delay between writing code and running it in production (*source: https://docs.docker.com/get-started/overview/ *).
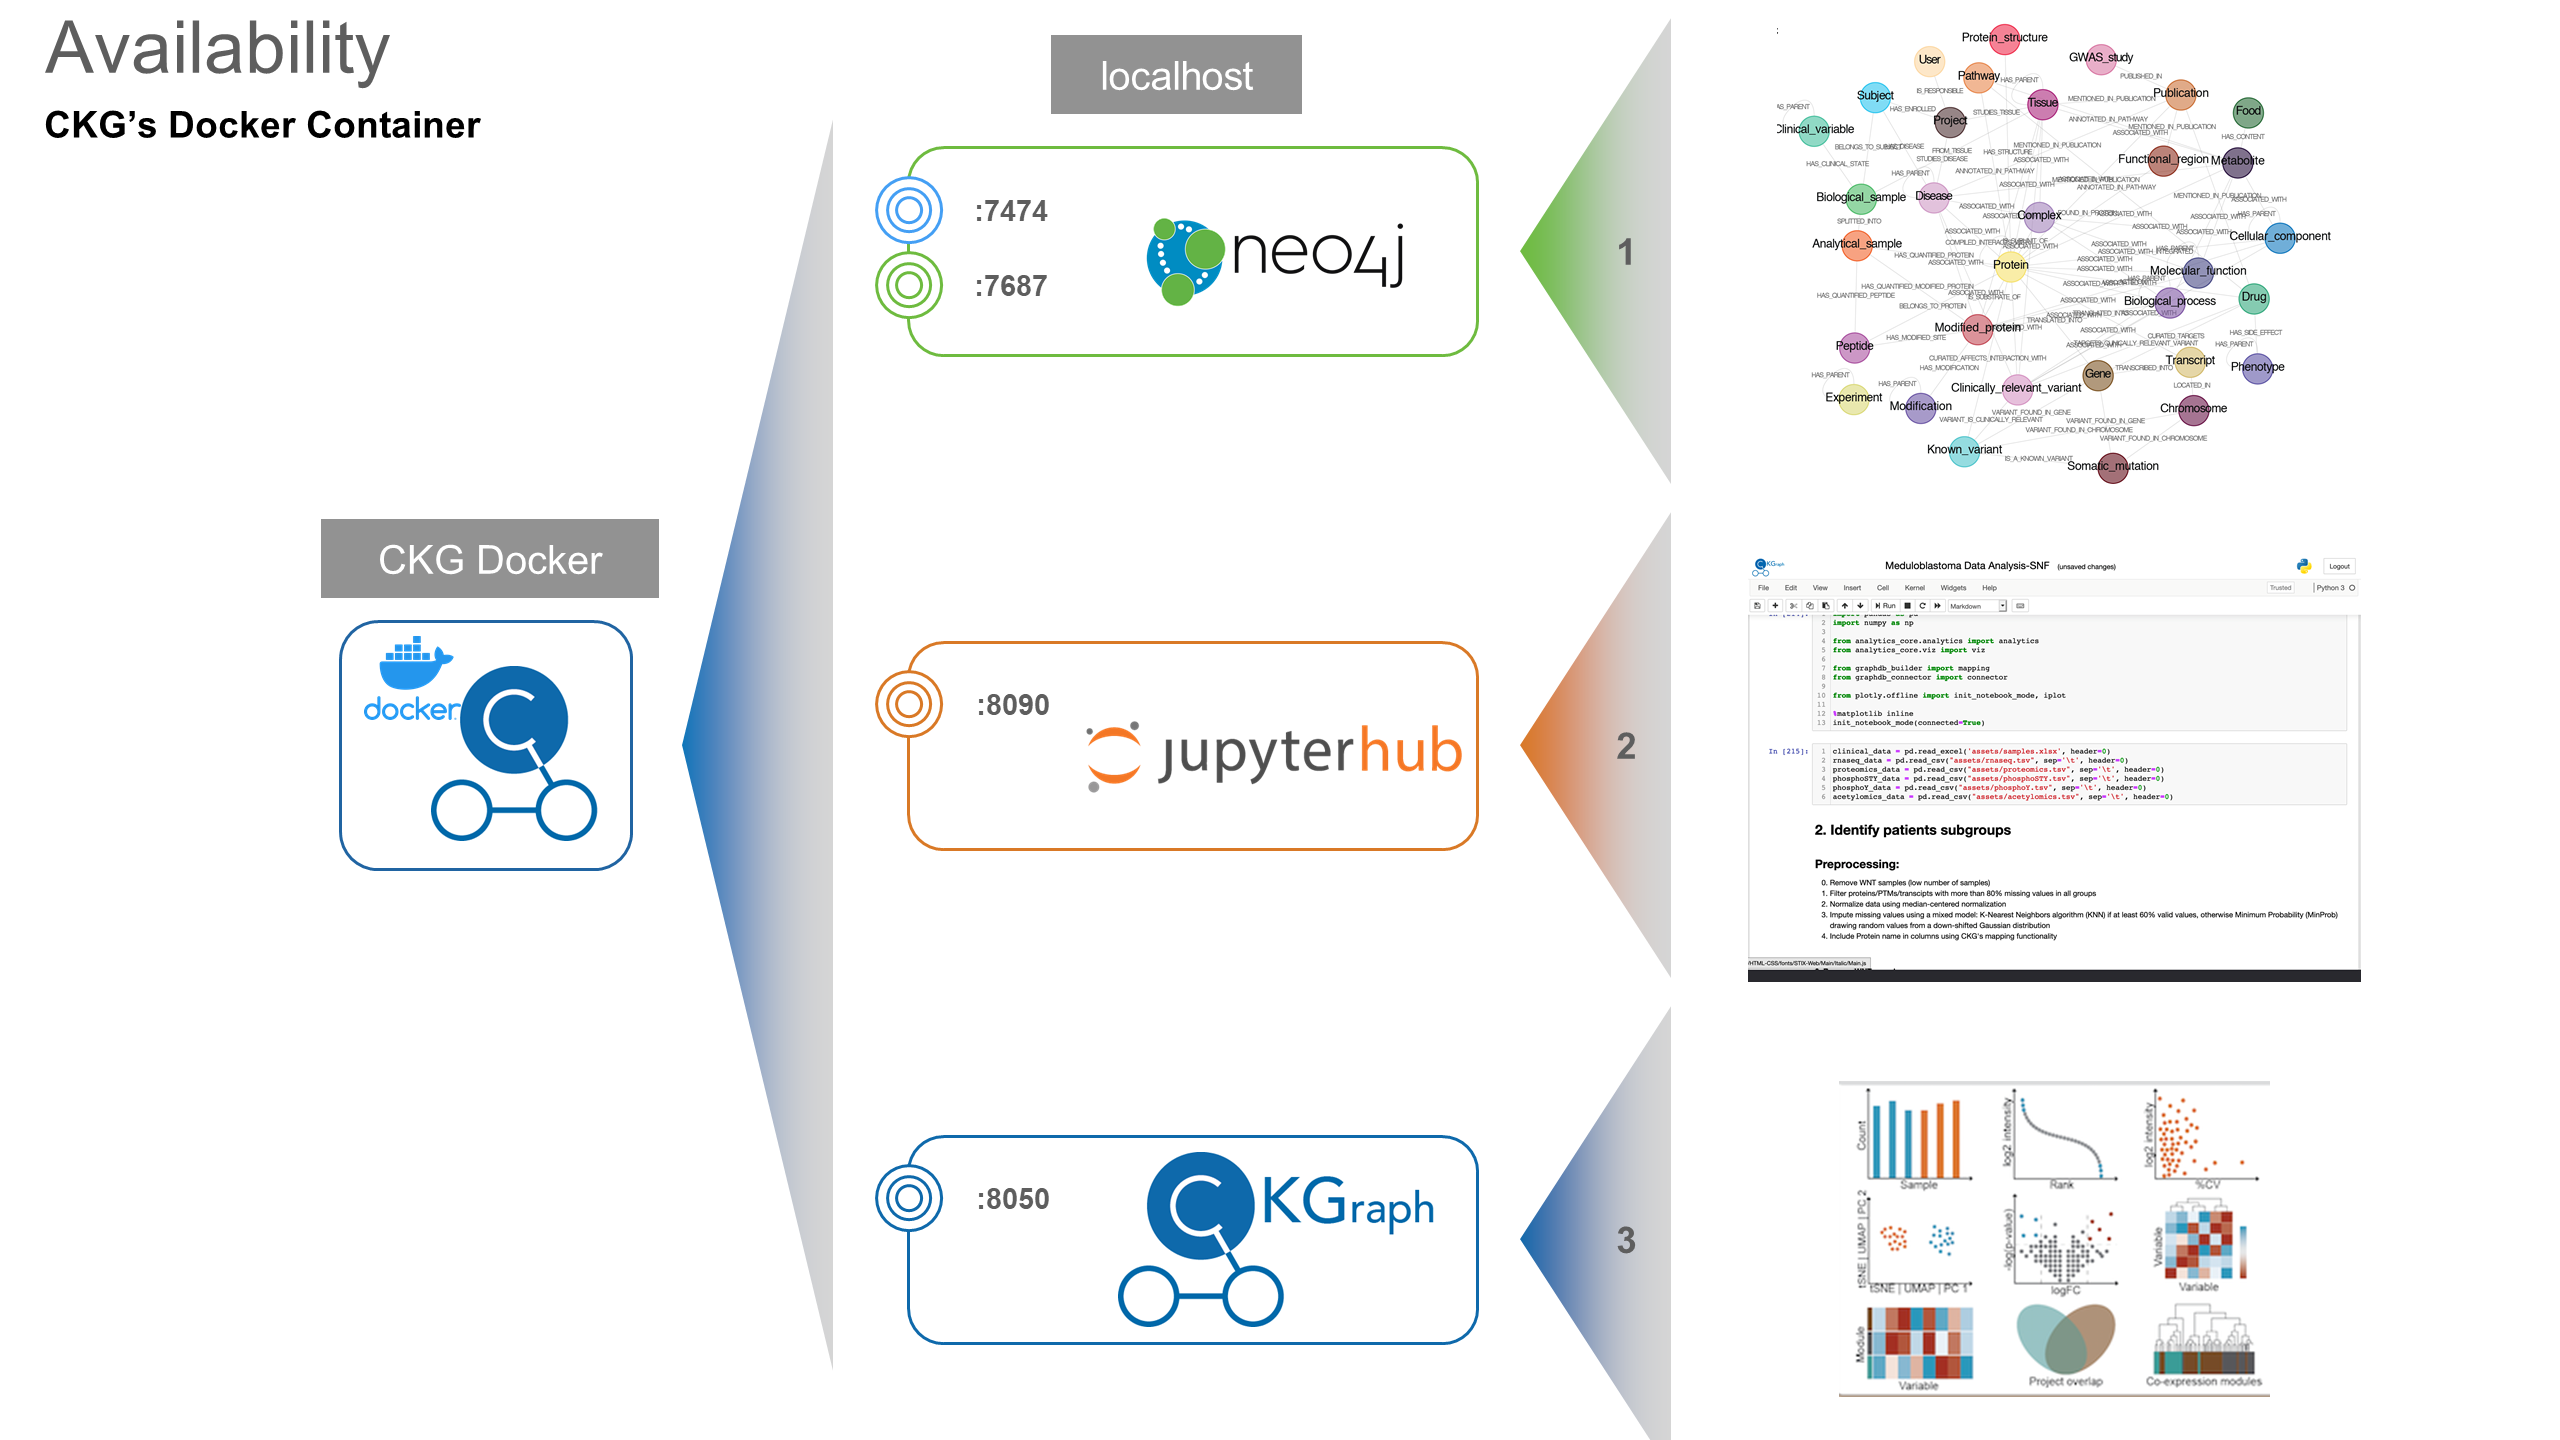
This container will install all the requirements needed, download source databases and build the CKG graph database, and open 5 ports through which to interact with the CKG.
Warning
This requires Docker to be previously installed (https://docs.docker.com/engine/install/). Notice that the installation in Unix systems is a bit different than in Windows or MacOS, check the instructions for your specific distribution (https://docs.docker.com/engine/install/#server).
Warning
Building the container requires ~200Gb of disk space. The image takes ~150Gb but during the building process you will need around 200Gb of disk space available (loading the database dump takes quite a bit of disk temporarily).
Warning
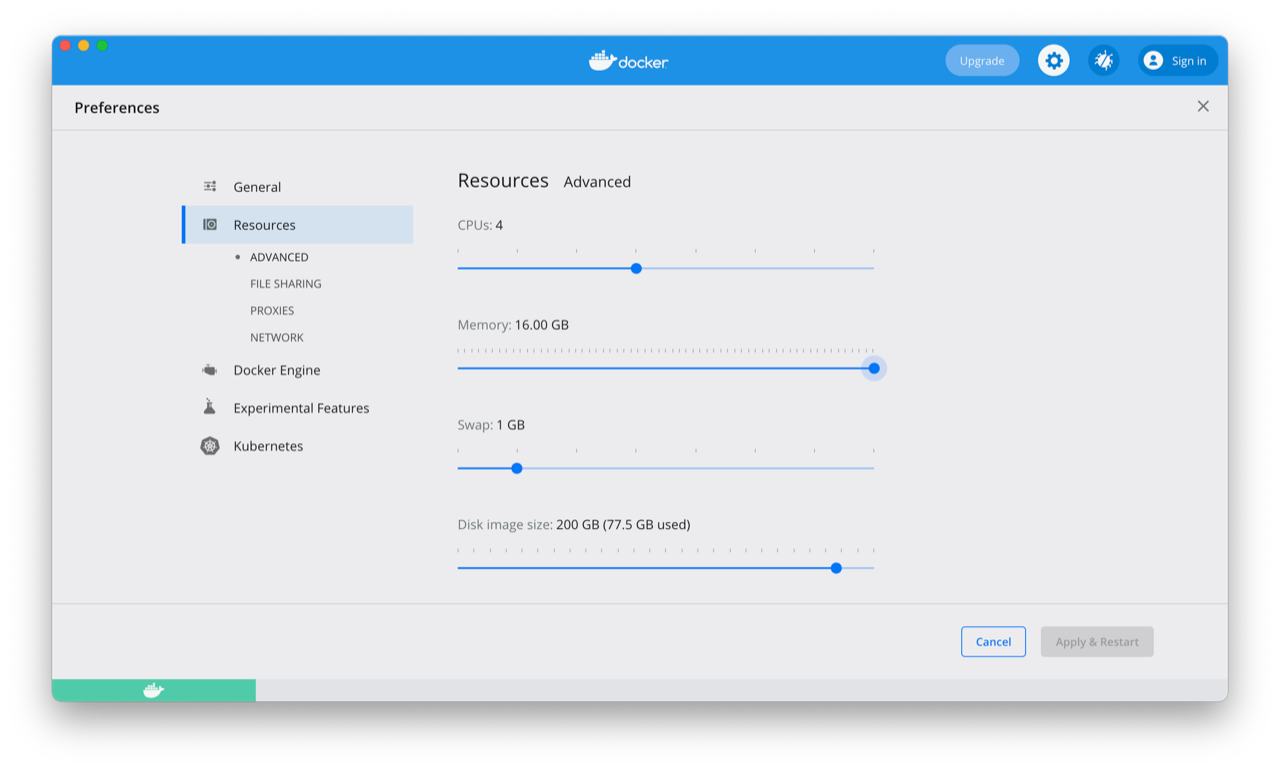
In MacOS, you will need to allocate more resources to Docker to adapt to CKG’s requirements. You can do this in Docker desktop -> Preferences. We recommend (at least) the following configuration:
To run the Docker, simply:
Clone CKG’s repository: https://github.com/MannLabs/CKG
Get licensed databases: Licensed Databases
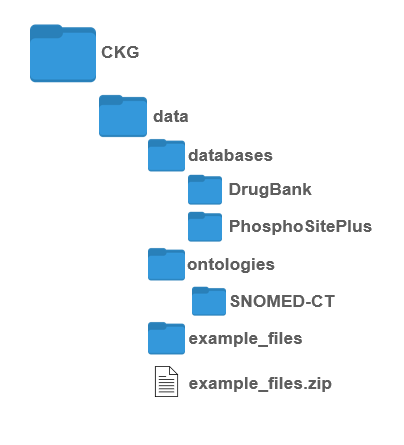
Copy the licensed databases in the right directories:
CKG/data/databases/{DrugBank|PhosphoSitePlus}
CKG/data/ontologies/SNOMED-CT
The data folder will look like this afterwards:
Build thecontainer:
$ cd CKG/
$ docker build -t docker-ckg:latest .
Run docker:
$ docker run -d --name ckgapp -p 7474:7474 -p 7687:7687 -p 8090:8090 -p 8050:8050 docker-ckg:latest
Once the container is running, you can open an interactive bash session using:
$ docker exec -it ckgapp bash
You will have access to the logs within the container at:
Neo4j:
/var/log/neo4jCKG:
/CKG/loguwsgi:
/var/log/uwsgi
Once the docker is running:
Access JupyterHub: http://localhost:8090/:
user:ckguser
password:ckguser
Access Neo4j browser (connection may take several minutes): http://localhost:7474/
Login using:
user: neo4j
password: NeO4J
When the database is running:
In your web browser access CKG app: http://localhost:8050/
Login using the test user:
user: test_user
password: test_user
In the Home page navigate to the Admin page
Run Minimal update (Minimal update) (these can take a while but will run in the background. Follow progress in the docker dashboard logs) and create a user
Explore options in CKG
Note
Remember that with Docker Desktop (https://www.docker.com/products/docker-desktop), you can check the logs of the running image.