Building CKG’s Graph Database
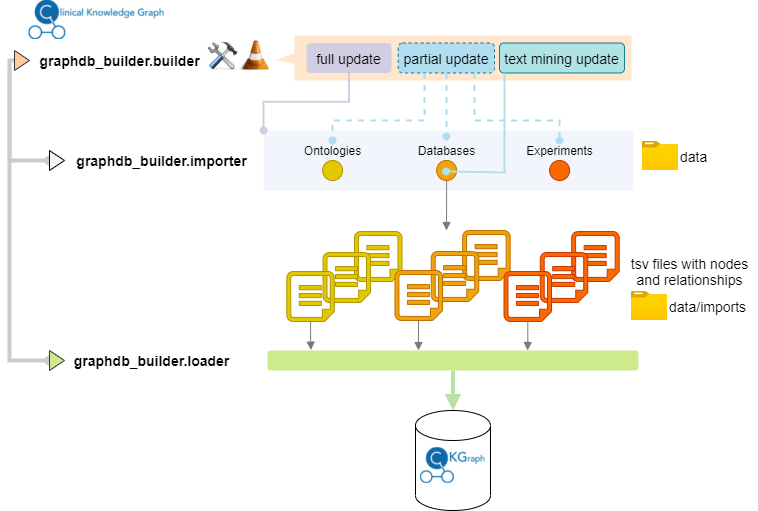
CKG has a dedicated module (graphdb_builder) that can be used to generate the entire Knowledge Graph (full update) or to update specific ontologies, databases or experiments (partial update). The module works as a 2-step process:
Import: uses specific parsers and configuration files to convert ontologies, databases and experimental data (projects) into tab-separated values files with the entities (nodes) and relationships to be imported into the graph database. The generated files are stored in the data/imports directory.
Loading: When loading data into the graph, we need to specify the type of node (entity) to be loaded. The types of nodes correspond to the defined data model:
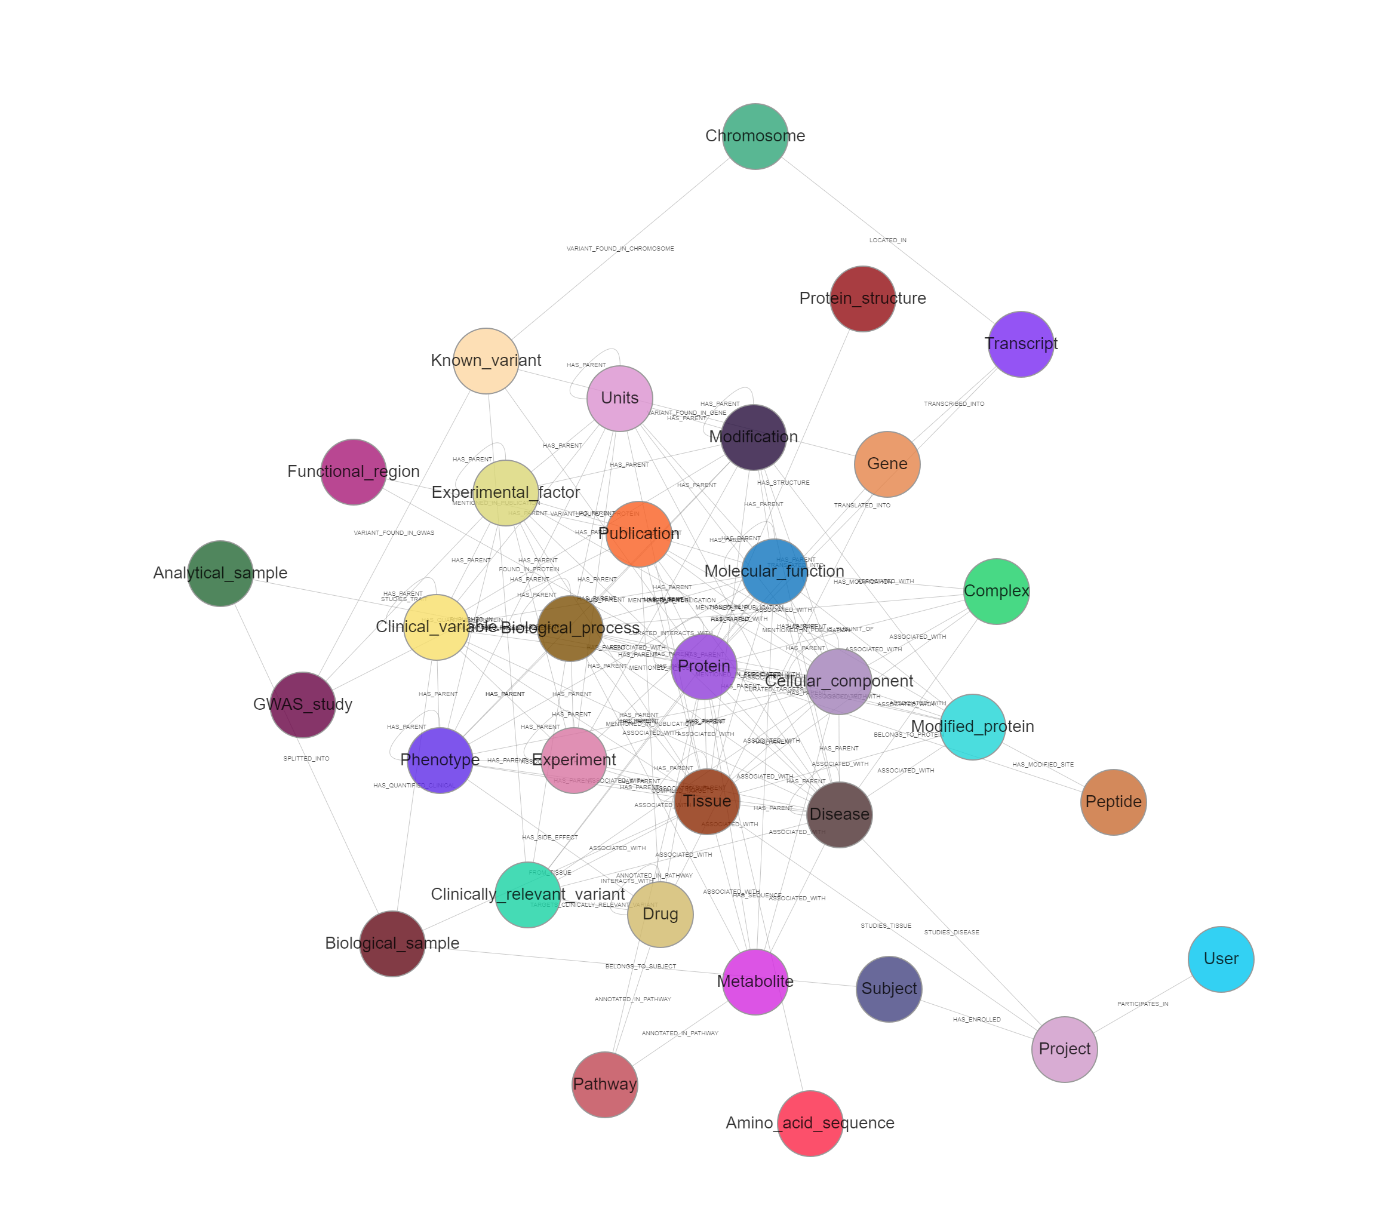
The list of entities to be loaded into the graph is defined in the builder configuration file under graph.
CKG has predefined Cypher queries to load the generated tsv files into the graph database. To facilitate the use and understanding of the queries, they are defined in YAML format, which allows to define attributes such as query name, description, nodes and relationships involved.
Warning
Remember that the graph database needs to be running when the database is being built or updated (Loading step).
Licensed Databases
Most of the biomedical databases and ontology files will automatically be downloaded during building of the database. However, the following licensed databases have to be downloaded manually.

PhosphoSitePlus database folder.
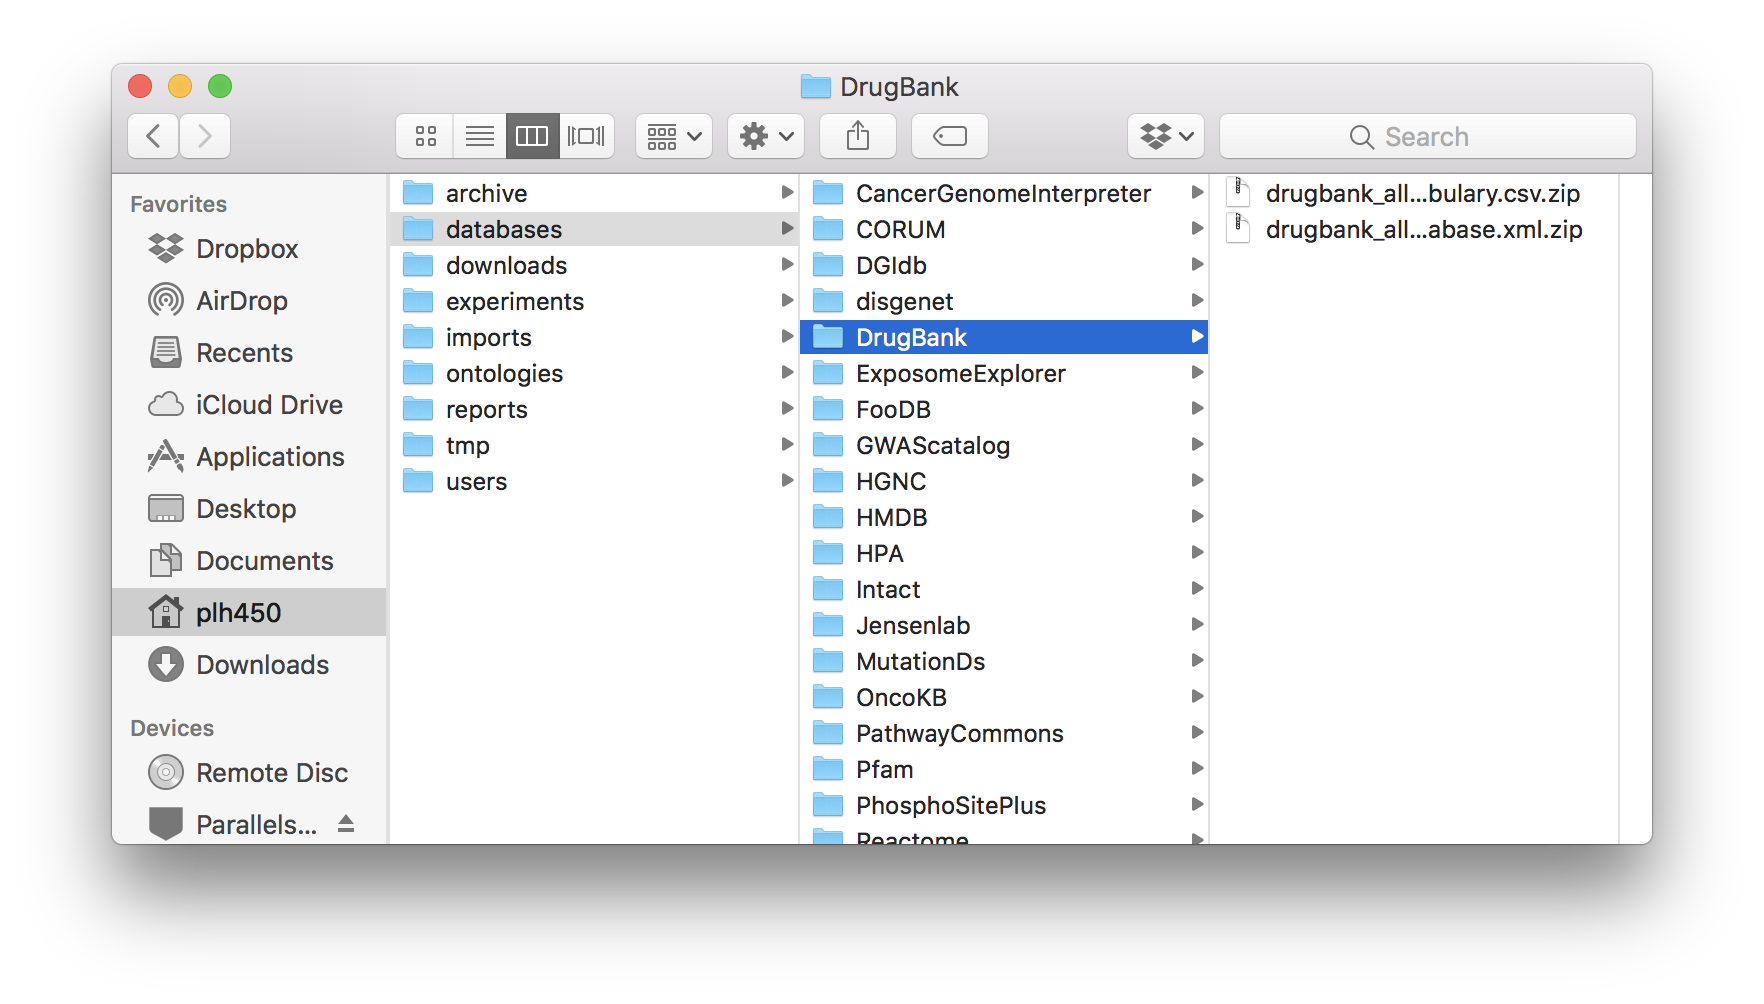
DrugBank database folder.
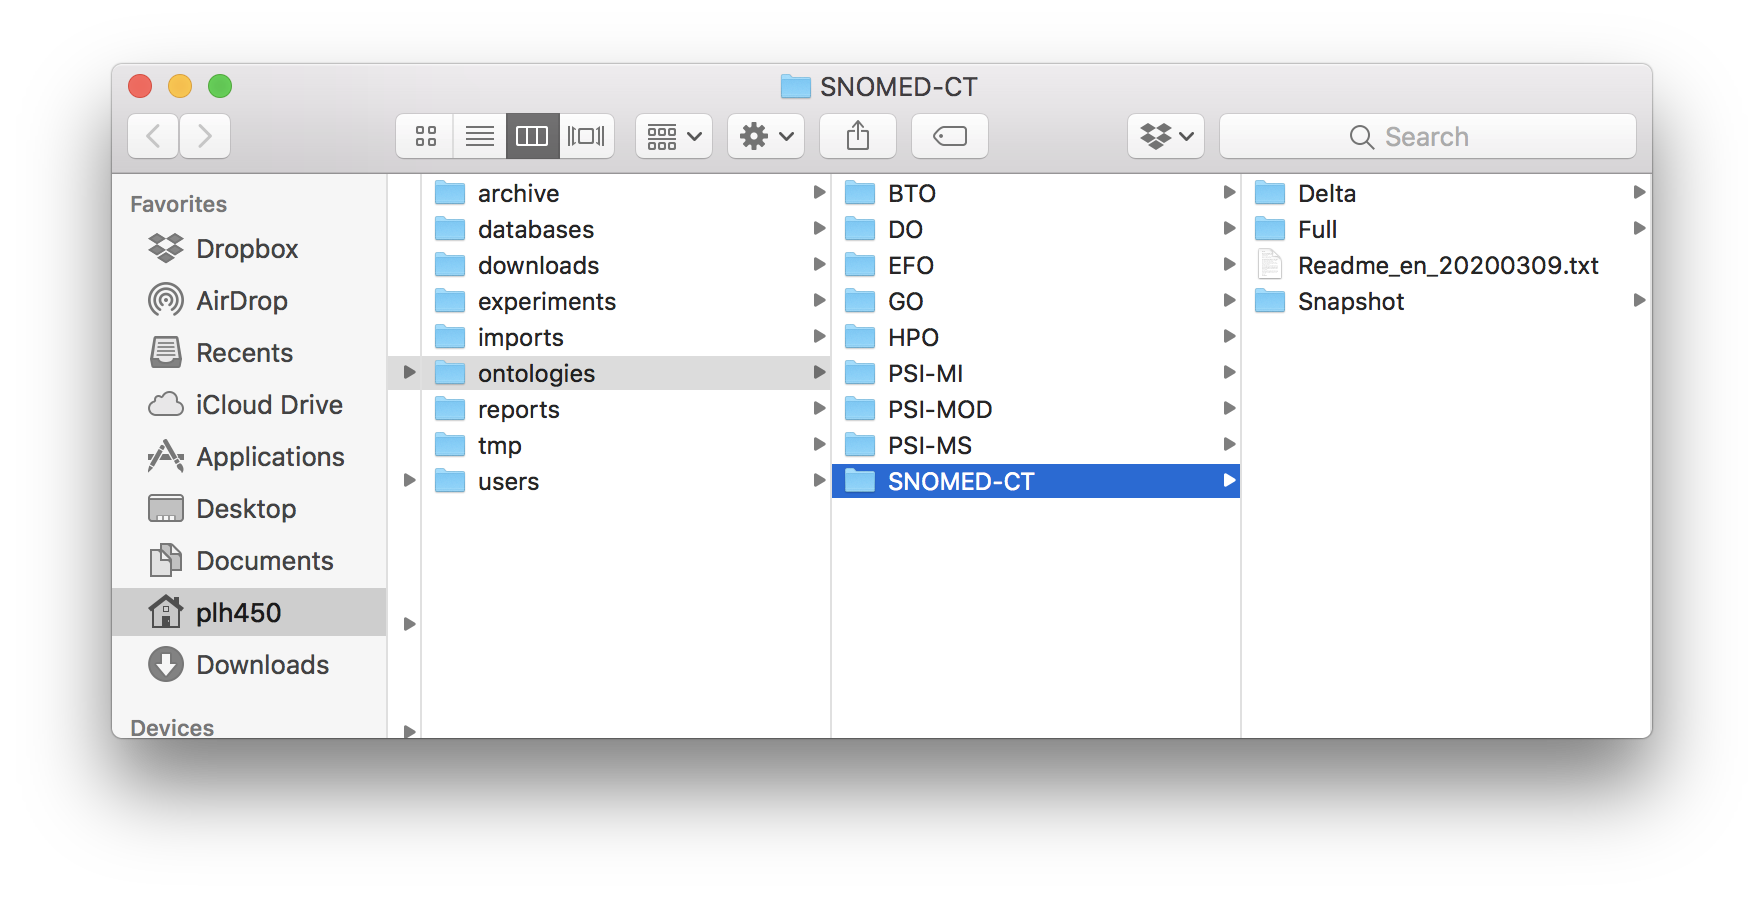
SNOMED-CT ontology folder.
PhosphoSitePlus: Acetylation_site_dataset.gz, Disease-associated_sites.gz, Kinase_Substrate_Dataset.gz, Methylation_site_dataset.gz, O-GalNAc_site_dataset.gz, O-GlcNAc_site_dataset.gz, Phosphorylation_site_dataset.gz, Regulatory_sites.gz, Sumoylation_site_dataset.gz and Ubiquitination_site_dataset.gz.
DrugBank: All drugs (under COMPLETE DATABASE) and DrugBank Vocabulary (under OPEN DATA).
SNOMED-CT: Download RF2 Files!.
After download, move the files to their respective folders:
PhosphoSitePlus:
CKG/data/databases/PhosphoSitePlusDrugBank:
CKG/data/databases/DrugBankSNOMED-CT:
CKG/data/ontologies/SNOMED-CT
In the case of SNOMED-CT, unzip the downloaded file and copy all the subfolders and files to the SNOMED-CT folder.
Warning
These three databases require login and authentication. To sign up go to PSP Sign up, DrugBank Sign up and SNOMED-CT Sign up. In the case of SNOMED-CT, the UMLS license can take several business days.
Note
If the respective database folder is not created, please do it manually.
Graph Database Builder
Full update
The full update goes through both steps (import and loading) and updates all ontologies, databases and the available experiments. There are several options to run the full update:
1) Command-line (executable) (Recommended)
$ ckg_build
This will initiate the full update with default parameters:
download=True – ontologies and databases will be downloaded from their sources
n_jobs=3 – 3 processes will be use simultaneously
2) Command-line (programmatically)
The module graphdb_builder/builder/builder.py can be called as a python script in the command-line. Use -h to get help on how to use it:
$ python builder.py -h

    usage: builder.py [-h] [-b {import,load,full,minimal}]
            [-i {experiments,databases,ontologies,users} [{experiments,databases,ontologies,users} ...]]
            [-l LOAD_ENTITIES [LOAD_ENTITIES ...]] [-d DATA [DATA ...]]
            [-s SPECIFIC [SPECIFIC ...]] [-n N_JOBS] [-w DOWNLOAD] -u
            USER

    optional arguments:
    -h, --help            show this help message and exit
    -b {import,load,full,minimal}, --build_type {import,load,full,minimal}
                            define the type of build you want (import, load, full
                            or minimal (after dump file))
    -i {experiments,databases,ontologies,users} [{experiments,databases,ontologies,users} ...], --import_types {experiments,databases,ontologies,users} [{experiments,databases,ontologies,users} ...]
                            If only import, define which data types (ontologies,
                            experiments, databases, users) you want to import
                            (partial import)
    -l LOAD_ENTITIES [LOAD_ENTITIES ...], --load_entities LOAD_ENTITIES [LOAD_ENTITIES ...]
                            If only load, define which entities you want to load
                            into the database (partial load)
    -d DATA [DATA ...], --data DATA [DATA ...]
                            If only import, define which ontology/ies,
                            experiment/s or database/s you want to import
    -s SPECIFIC [SPECIFIC ...], --specific SPECIFIC [SPECIFIC ...]
                            If only loading, define which ontology/ies, projects
                            you want to load
    -n N_JOBS, --n_jobs N_JOBS
                            define number of cores used when importing data
    -w DOWNLOAD, --download DOWNLOAD
                            define whether or not to download imported data
    -u USER, --user USER  Specify a user name to keep track of who is building
                            the database
For a full update:
$ python builder.py --build_type full --download True --user ckg_user
3) Admin page (CKG app)
In CKG’s app, the Admin page provides as well the option to start a full update of the database.
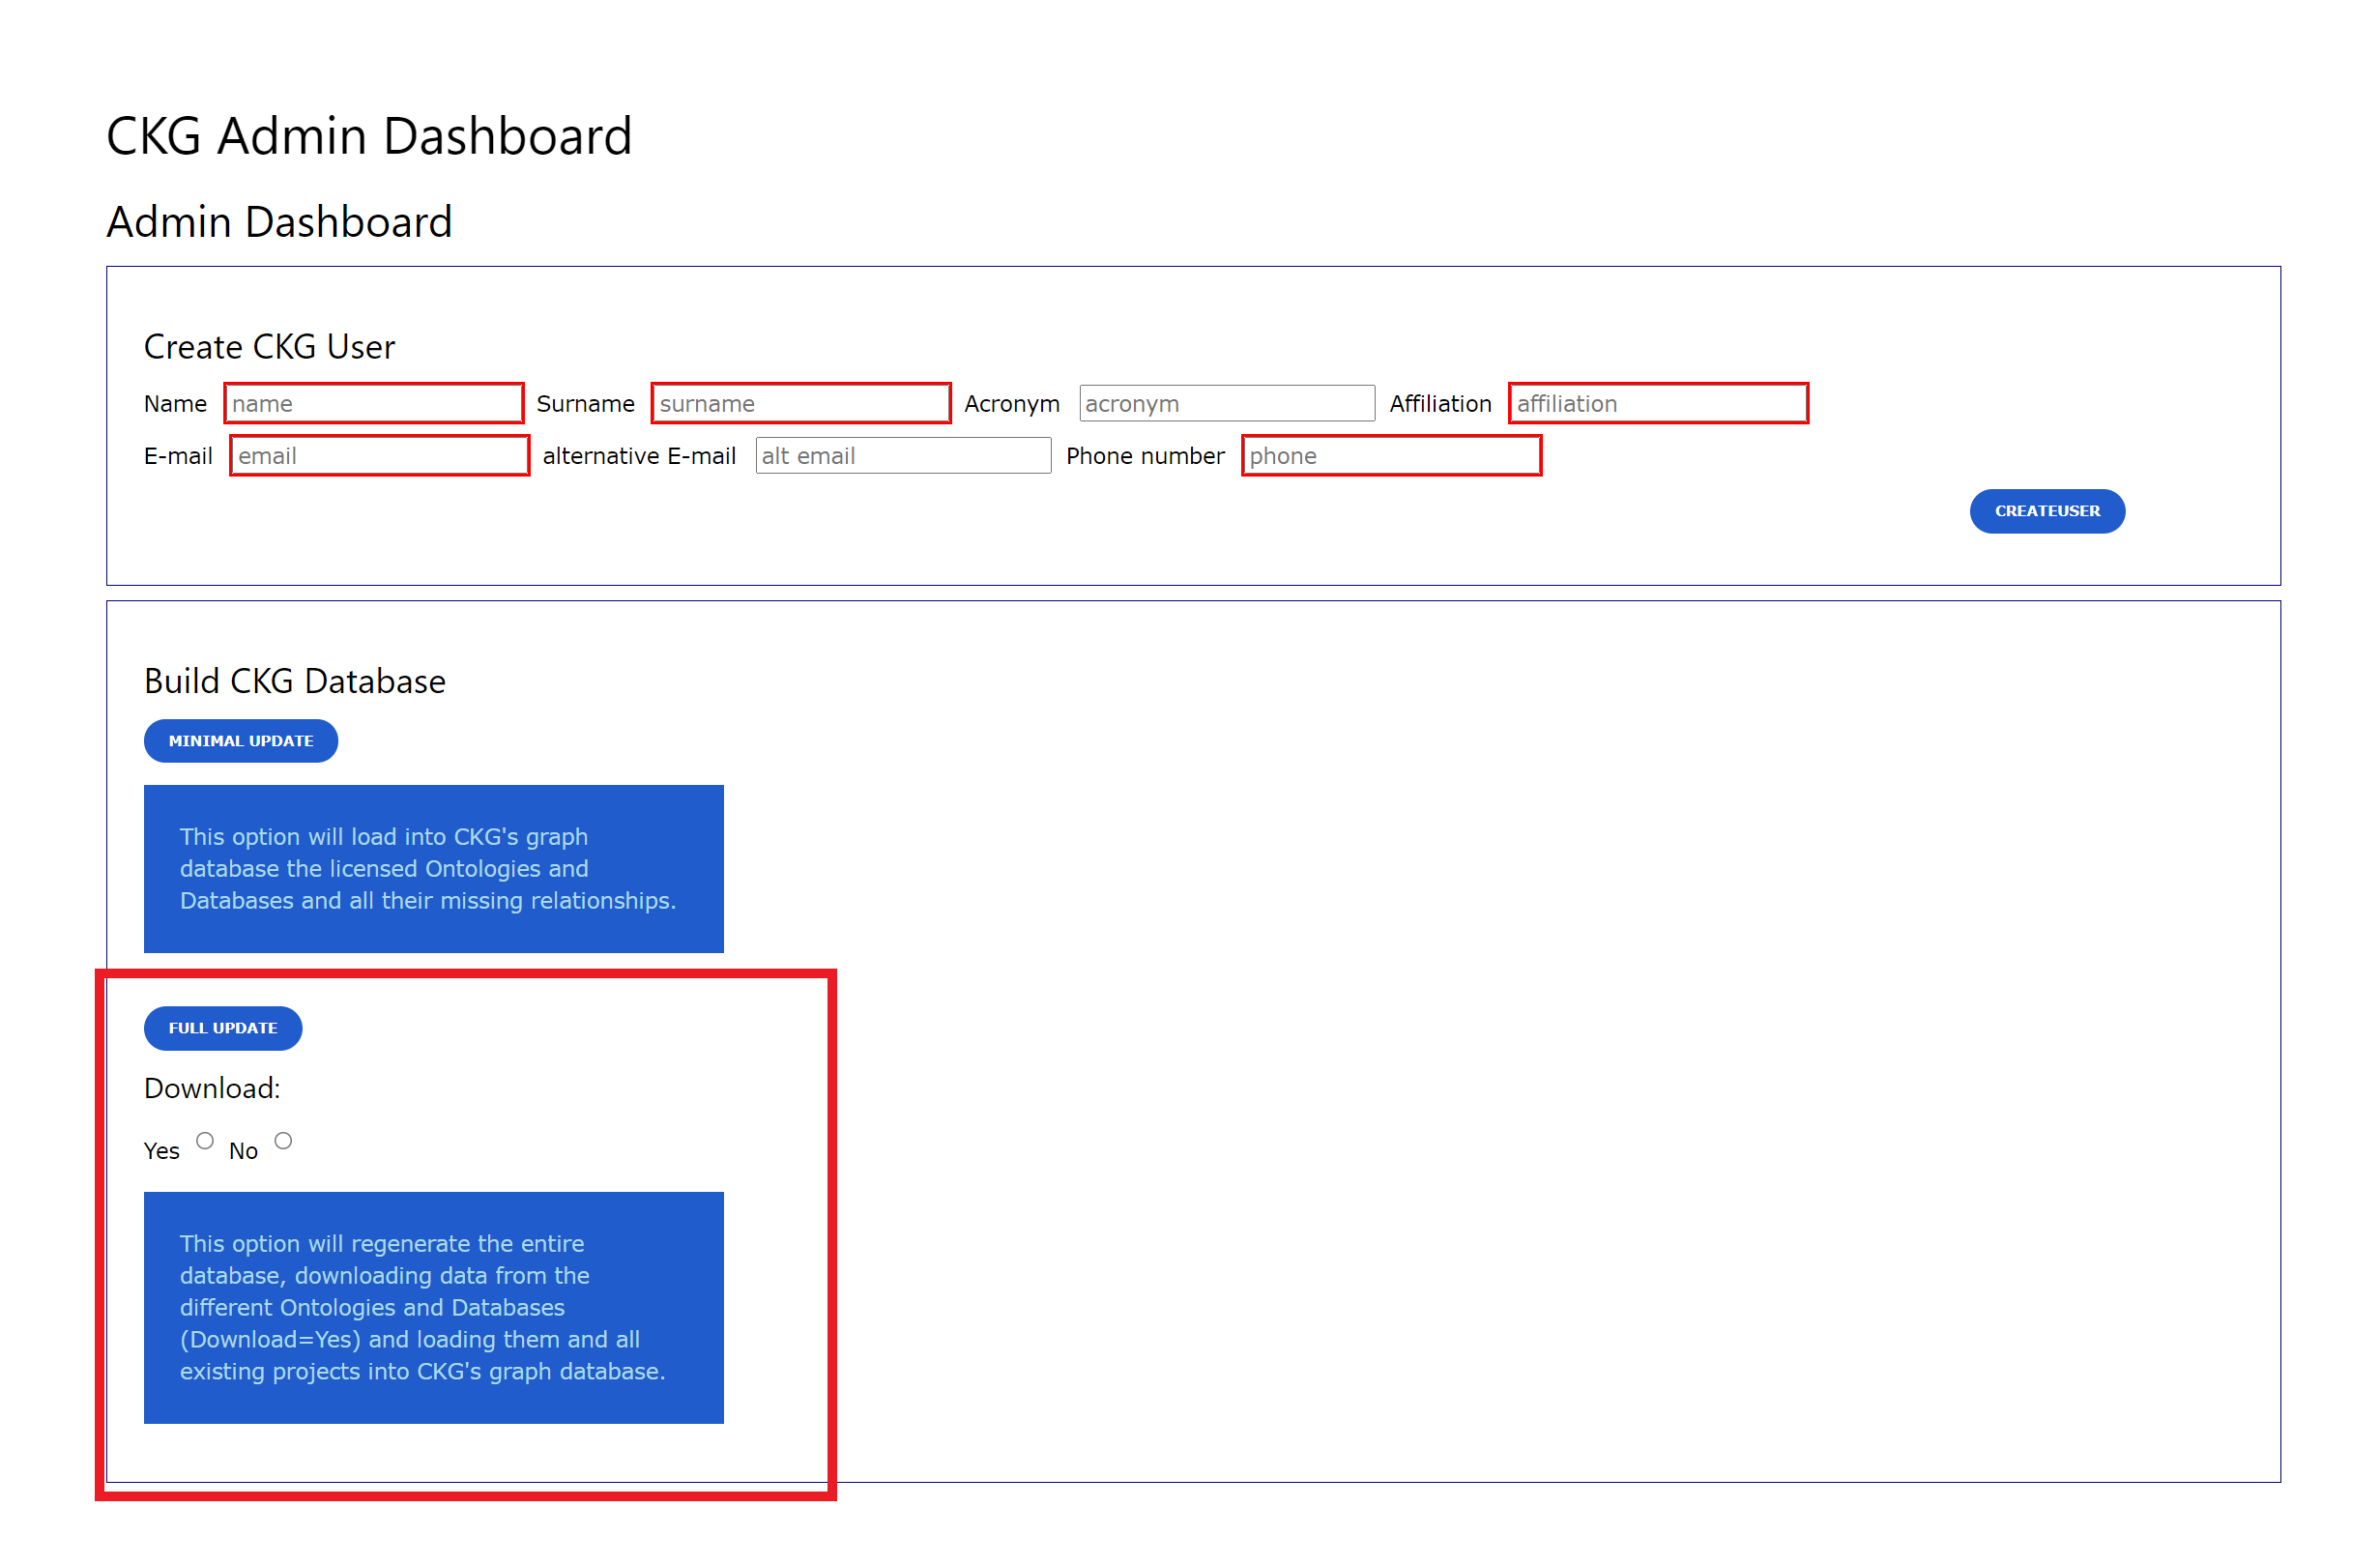
Warning
This option takes longer than the command-line options because multi-processing is not possible.
Partial update
If you want to update a specific ontology, database or project, you can use the partial update functionality in graphdb_builder. The partial update is done programmatically only and you will need to define which ontologies or databases names, or project identifiers to update. The ontologies and databases that are available to import can be checked in the configuration files: ontologies_config.yml under ontologies and databases_config.yml under databases. The partial update is again a 2-step process, so you will need to import the ontologies/databases/projects and then load them into the graph.
For instance, to update the Disease Ontology:
$ python builder.py --build_type import --import_types ontologies --data disease --download True --user ckg_user
$ python builder.py --build_type load --load_entities ontologies --specific disease --user ckg_user
To update a database:
$ python builder.py --build_type import --import_types databases --data HMDB --download True --user ckg_user
$ python builder.py --build_type load --load_entities metabolite --user ckg_user
Minimal update
To easily have CKG up and running we provide a database dump that can be easily uploaded following Building CKG’s Graph Database from a Dump File.
However, as mentioned before licensed databases and ontologies are not provided in this dump file and you will need to apply for access to get them into CKG’s graph database.
When you get access to these data, you download them and store them into the right data folders (folders). Together with the dump file, you can download a folder with data.tar.gz, which contains relationships from existing nodes in the database
to nodes created from the licensed databases (i.e. (:Drug)-[:HAS_SIDE_EFFECT]-(:Phenotype)). Unzip the contents in CKG/data/ so that the data folder looks like the figure depicted.
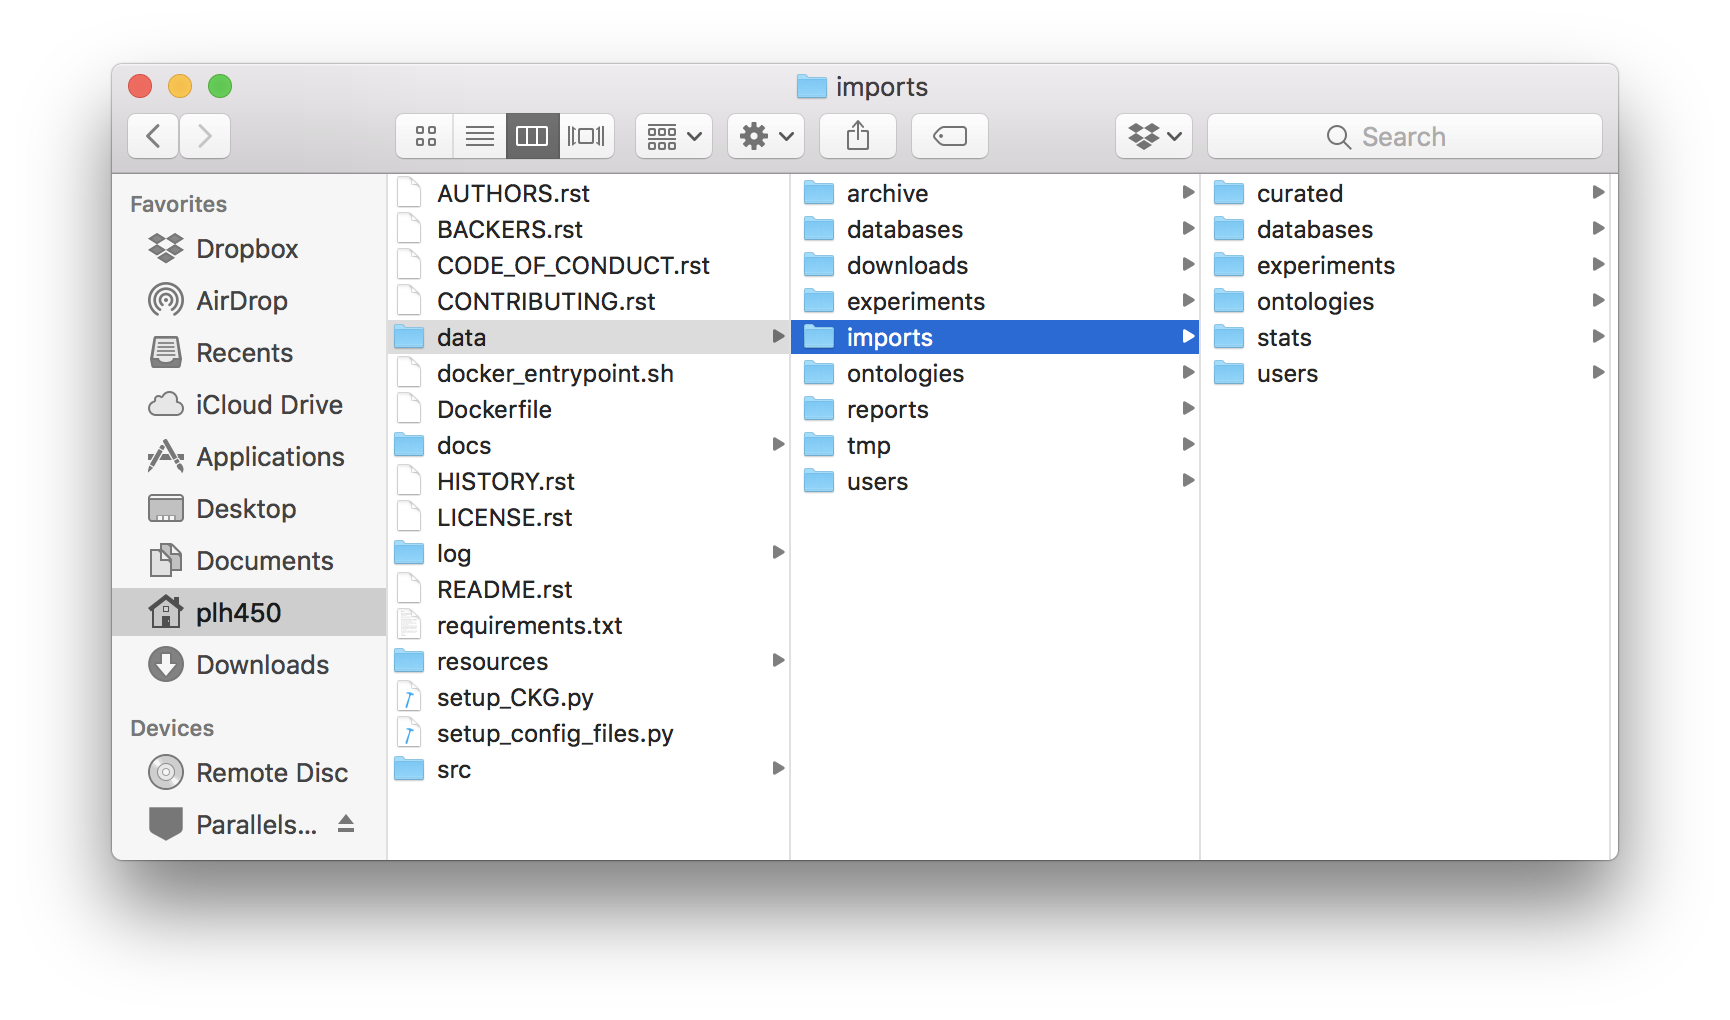
Final CKG/data folder architecture.
Afterwards, you can run the minimal update, which will parse these databases and ontology and generate the missing nodes and relationships in the database.
$ cd CKG/ckg/graphdb_builder/builder
$ python builder.py -b minimal -u username
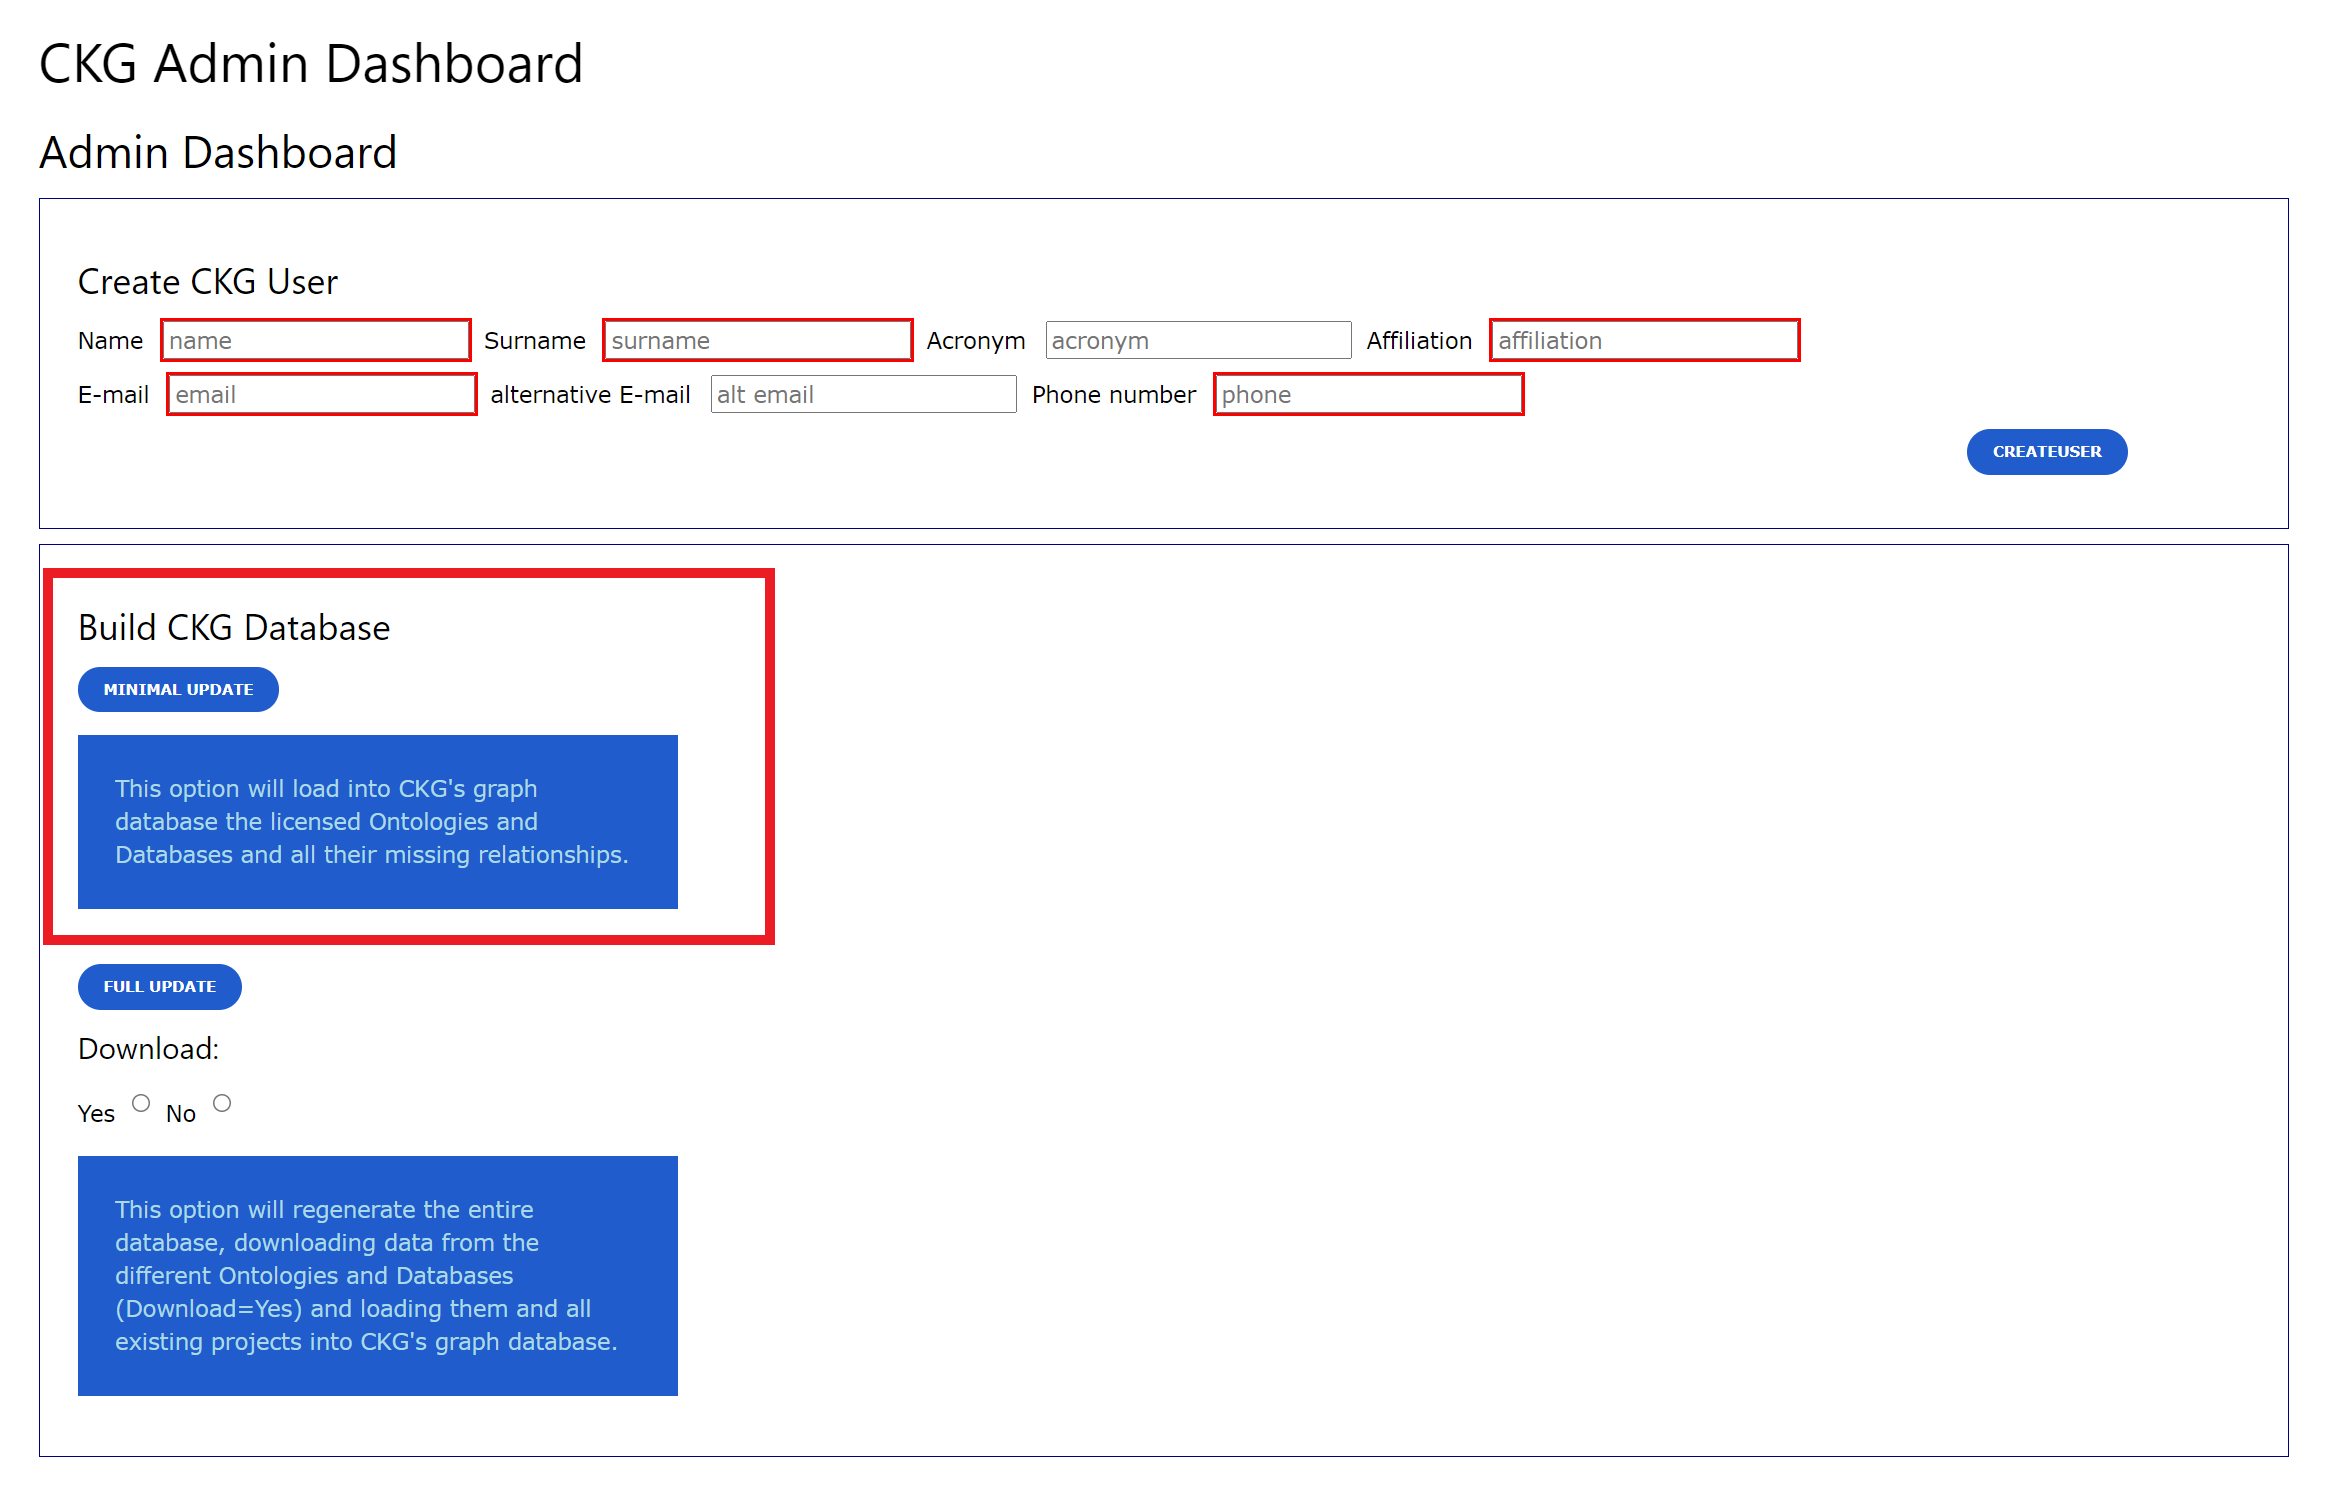
The Minimal update can be also done through the Admin page in CKG app.
Text mining update
The text mining results in CKG are collected from the Jensen Lab download page and are generated using the tagger tool.
CKG collects the relevant textmining_mentions files (human, chemicals, diseases, tissues, etc) and parses them to obtain edgelists of protein-publication, drug-publication or disease-publication associations among other that can be loaded into the knowledge graph.
These files are updated in a weekly basis, and given the number of open access publications made available in a week, it may be convinient to update the Knowledge Graph also with certain periodicity.
For that, you can use the functionality ckg_update_textmining paired with a task scheduler to update the textmining results from the Jensen lab (https://jensenlab.org/).
To run the text mining update:
$ cd CKG
$ conda activate NAME_OF_YOUR_ENVIRONMENT
$ ckg_update_textmining
This will start a partial update of the Publication nodes and their relationships to other entities: tissues, diseases, proteins, etc. The update takes a while but can run in the background.
Building CKG’s Graph Database from a Dump File
A dump file of the database is also made available in this link and alternatively, you can use it to load the graph database contained in it.
To do so, download the dump file ckg_latest_4.2.3.dump and also data.zip from this `link <https://datashare.biochem.mpg.de/s/fP6MKhLRfceWwxC/download>, which contains some nodes and relationships associated to the licensed databases.
The .dump file will be used to load the Neo4j graph database:
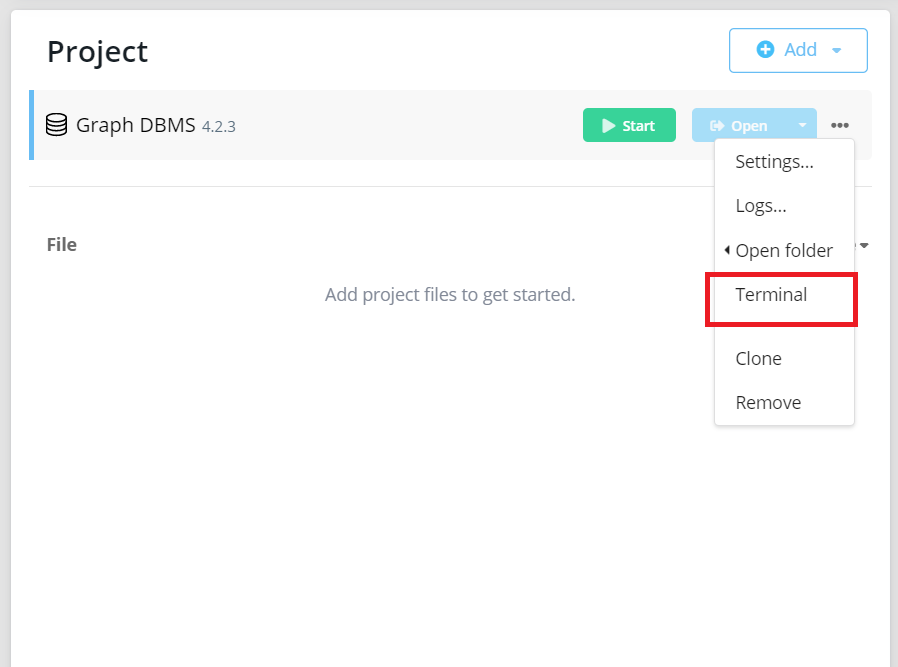
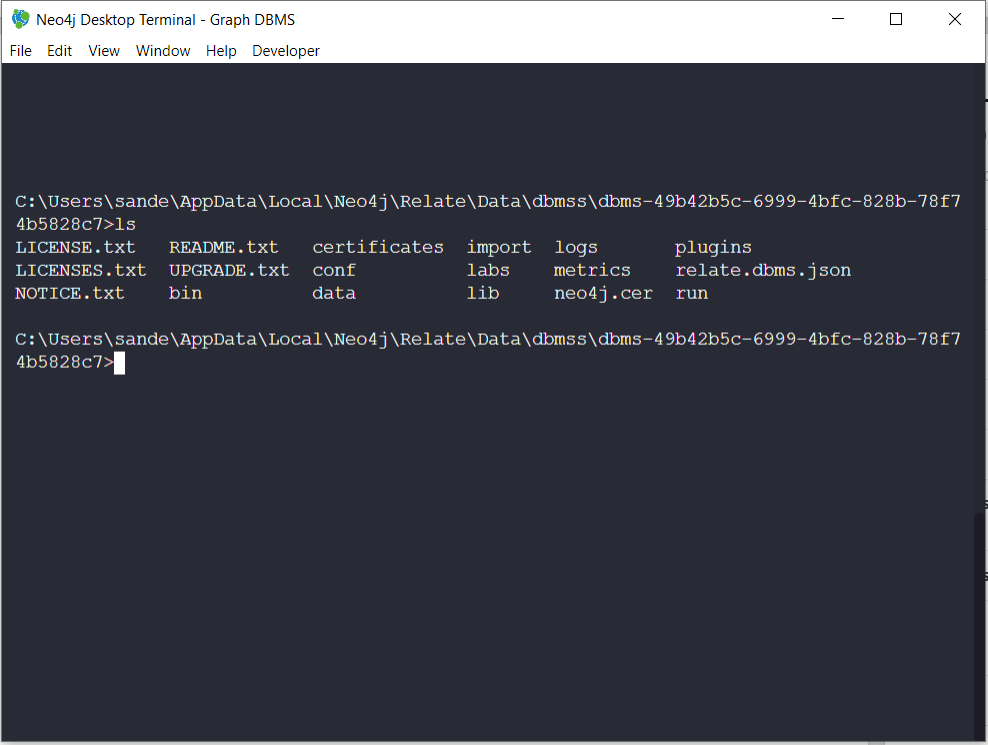
If you have Neo4j desktop installed, you can use Neo4j terminal to access the path where the database is installed.
Create
backupsandgraph.dbfolders:
$ mkdir backups
$ mkdir backups/graph.db
$ cp ckg_latest_4.2.3.dump backups/graph.db/.
After copying the dump file to backups/graph.db/, make sure the graph database is shutdown and run:
$ bin/neo4j-admin load --from=backups/graph.db/ckg_latest_4.2.3.dump --database=graph.db --force
In some systems you might have to run this as root:
$ sudo bin/neo4j-admin load --from=backups/graph.db/ckg_080520.dump --database=graph.db --force
$ sudo chown -R username data/databases/graph.db/
Warning
Make sure the dump file naming in the command above, matches the one provided to you.
Note
More information about restoring a database dump at Neo4j docs.
Once you are done, start the database and you will have a functional graph database.
More on the dump file
Another great use for the dump file, is to generate backups of the database (e.g. different versions of the imported biomedical databases). To generate a dump file of a specific Neo4j database, simply run:
$ cd /path/to/neo4jDatabases/database-identifier/installation-x.x.x/
$ bin/neo4j-admin dump --database=neo4j --to=backups/graph.db/name_of_the_file.dump
Warning
Remember to replace name_of_the_file with the name of the dump file you want to create.